Attachments
Attachments can be included in the NEMSIS import file or manually uploaded and attached to the claim.
Viewing attachments on an incomplete claim
Let's quickly review how to view/work an imported claim.
-
Dashboard:
-
No issues: If the system does not have issues with the patient on the imported claim (the patient is not a possible duplicate of an existing patient record), then the imported claim will display in the 'Incomplete' workflow button on the Dashboard.
-
Issues: If there are issues with the patient on the imported claim, you will need to verify the patient information. In this case, the imported claim will display in the "Incomplete - Verify patient account" button on the Dashboard.
-
-
Imported Claims page: You can always see a list of import files and claim numbers generated by the import by hovering over Claims on the navigation bar and then clicking "Imported Claims." On the import file line, click the claim number to view the incomplete claim.
To view the attachments, click the "Attachments" link on the Incomplete Claim page.
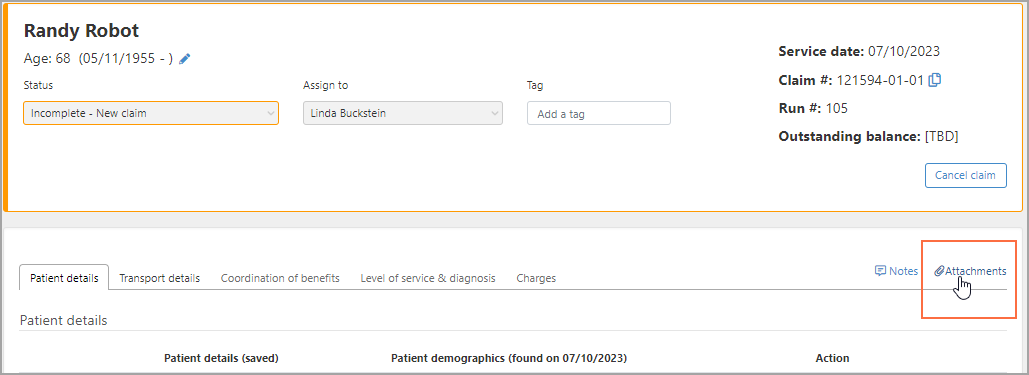
The Attachments window displays all attachments included in the import.
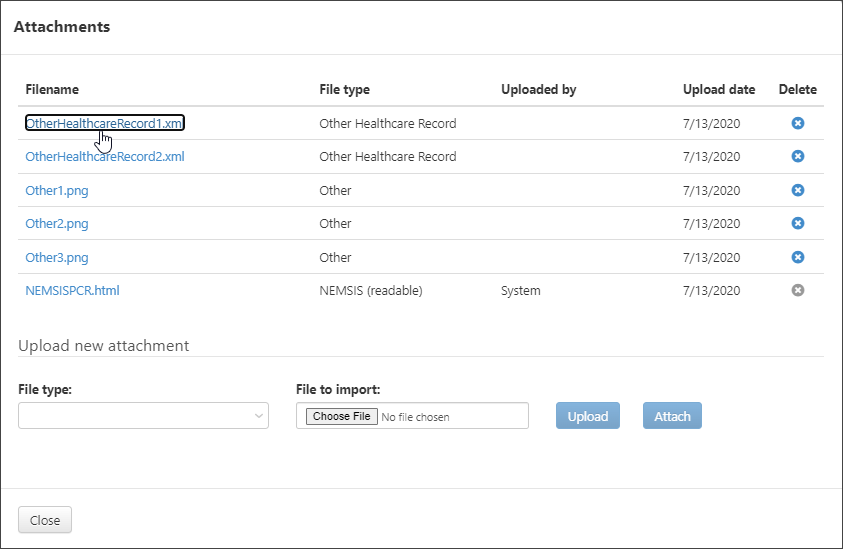
To view, click the attachment.
To delete, click the X under the "Delete" column.
Adding an attachment to an incomplete claim
-
Bring up the incomplete claim via the Dashboard > "Incomplete claim" button or hover over Claims and then click Imported Claims. On the Imported Claims page, scroll down the list and then click the blue claim number associated with import.
-
On the Incomplete Claim page, click the Attachments link.
-
On the Attachments window, click the File type field and select a type from the list.
-
Click Choose File to navigate to the location on your computer where the file resides.
-
Click Upload.
-
After the file successfully uploads, then click Attach to associate the file with the claim.
-
Click Close.
Viewing, editing, and deleting attachments on a complete claim
-
Enter the claim number or patient name in the Search field and then click the claim number on the Search Results page.
-
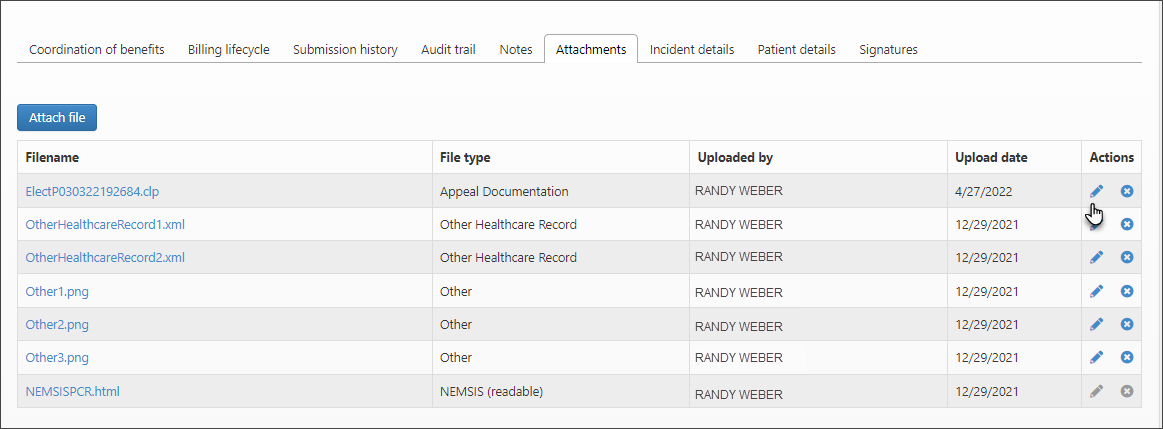
On the Claim page, click the Attachments tab.
-
To view the file: The attached file name displays as a link under "Filename." Click the blue name of the file to download to your PC.
-
To delete the file: Click the
 under the "Actions" column.
 -
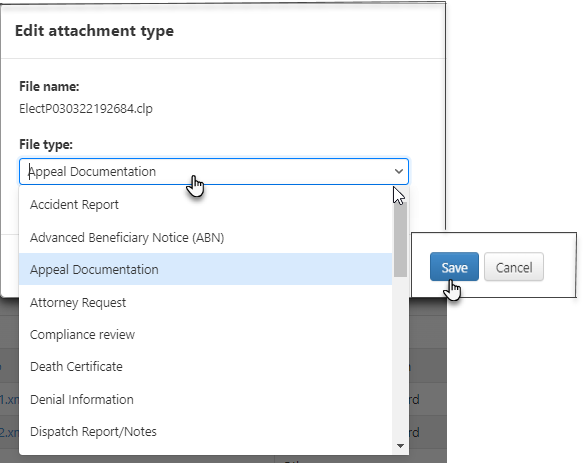
To edit the file type: Click the pencil
 under the "Actions" column. On the "Edit attachment type" window, click the "File type" field and select a type from the list. Click Save.
Adding attachments to a complete claim
-
Enter the claim number or patient name in the Search field and then click the claim number on the Search Results page.
-
On the Claim page, click the Attachments tab.
-
Click 'Attach file.'
-
On the Attach File window, click the "File type" field and then select the type from the list.
-
Click 'Choose File' and then navigate to the location on your PC where the file resides.
-
Click "Upload."
-
After the file successfully uploads, click "Attach."
Edit and delete attachments
You can edit and delete most attachment types. There are instances where you cannot – for example you cannot edit a NEMSISPCR file type. For attachment types that you cannot change, the edit and remove icons are grayed out.
Edit the attachment type
-
On the Claim page, click the Attachments tab.
-
On the line of the attachment you wish to change, click the pencil icon.
-
Click in the "File type" field on the "Edit attachment type" pop-up window. Click the file type in the list and then click Save.
Delete an attachment
-
On the Claim page, click the Attachments tab.
-
On the line of the attachment you wish to change, click the X icon.
-
On the confirmation pop-up window, click "Delete attachment."